
Being resourceful, low on funds and lots of materials around I decided to make my own.
It was fun, at times and messy, most of the time.
PLANNING:
I had an idea in mind and wanted the banner to hang over the front of stall like a long table runner with my logo clearly seen.
I was lucky enough to be given ALOT of white cotton sheets from my Mother in Law quickly whipped up basic long rectangle and made sure the edges had fancy stitches.
I also have alot of DYLON IMage maker from a project which didn't pan out. I admit never had much success with this stuff before but not wanting to waste the stuff or money decided to use what I have.
WARNING: If you have never used image maker before it is VERY messy and has a stange horrid texture. Be sure to cover all areas used and wash any items used immediately after use, if any gets on your hands wash immediately. Wear old clothes or apron.
MATERIALS:
fabric
DYLON Image maker
Printed Image: remember if has wording print backwards.
Covered surface: i use thin acetate sheets under my project so even though can't be seen every area is covered.
Few extra items but will have these anyway.
GOOD TO GO:
These are edited instructions, there are printed ones included on packaging and these should be followed exactly.
1) Gather your items.

2)Trim image to required size.

3)Cover the image until not clearly seen through paste.
May take couple of coats.
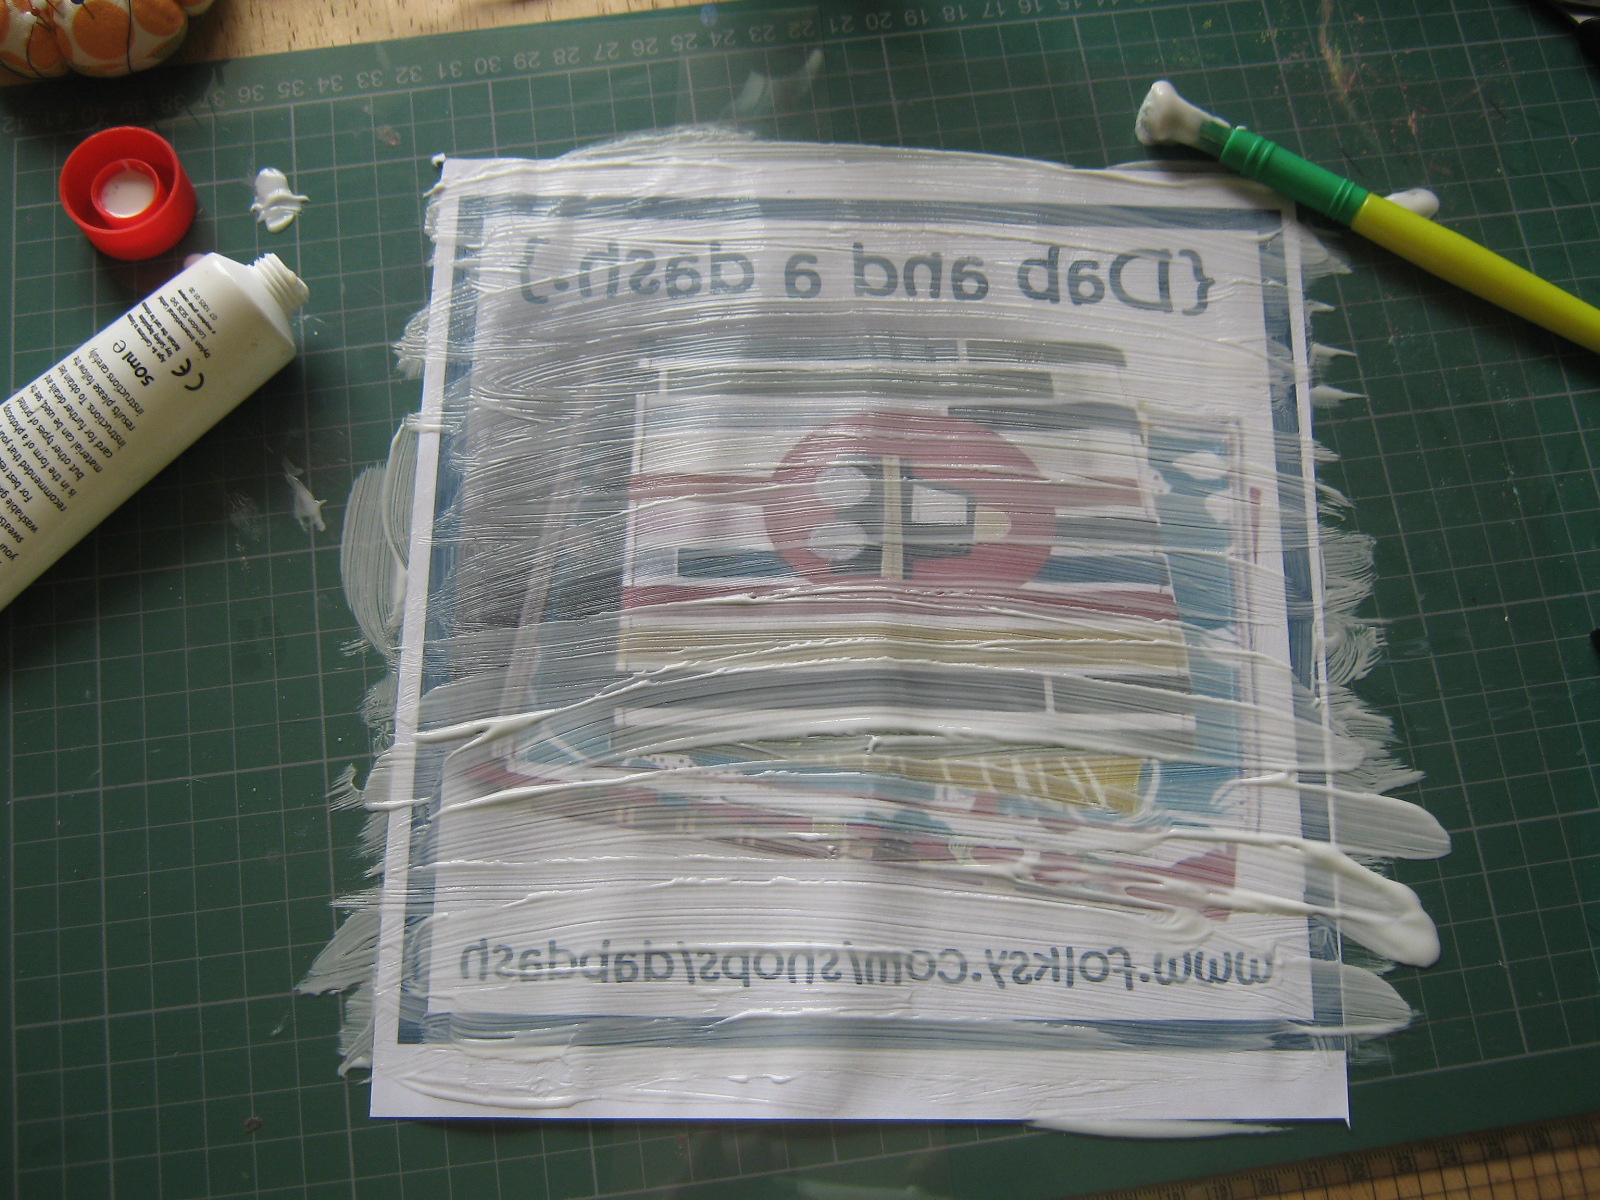
4)Lay the image paste side down onto the fabric.
Use a rolling pin to make sure the paste is evenly spread and gets into the fabric.
Continue this for a few minutes.
(again I have an acetate sheet between the rolling pin and fabric, also under the fabric)

5)Leave to dry...preferably overnight.

6)Use a sponge to wet the picture, rather than saturate instantly it's best to wet gradually, allow it to soak.

7)Start at centre and using your finger roll the paper until the top layer has been removed.

8)It's not clearly seen but you will have fuzzy bits of paper. Remove these with a wet sponge.
Leave to dry.

9)When dry again remove any left over paper and "fuzz" with a sponge and leave to dry.
I noticed I had managed to wipe the colour from the border over the edge of the image, but liking the shabby effect continued so it was the same all the way round.

10)When dry seal your image by placing a few drops of the paste onto the image and, using a clean cloth, gently rub into the grain of the fabric.
Leave to dry.

11)Show off your fantastic finished banner.

The photo was taken in awful lighting so doesn't do completed project justice.
Also had a toddler running his cars along the fresh fabric at the top so the image kept moving...
I admit I am still not a fan of Image Maker paste and the picture isn't perfect BUT I had fun and learnt along the way.
I have yet to create a perfect, crisp image so anything I create using this Paste has been for my shabby chic projects...
...But If you have created something fantastic please add a link.
Pop along and say hello.
9 comments:
Looks absolutely brilliant - hard work well worth it!
What a great idea! Looks fab, thanks for sharing.
Ursula x
Hello - will try and pop along to Warkton to take a peek at your lovely creations. x
That looked like a lot of work, but worth the effort, it looks great. Good luck with the craft fair!
Wow that's great
What a good idea.
You always amaze me how you find the time to be so creative
Hope the fair goes well.
(just had a look at he web site for your village hall... the cake stall looks amazing!)
I've never used paste like that before, it looks like fun and your banner looks lovely. Good luck at the fair
xx
well done thats looks brill, never even knew you could do that with a paste...it looks great fun...but too mesyy for me lol
and good luck at ur next craft fair too xxxx
Just discovered your site and I'm enjoying looking through your archives! I love your notebook, I never thought of combining traditional bookbinding skills with fabric covers (I don't know why it didn't occur to me...it just didn't!). Great banner too, will bookmark it in case I ever do a fair! Keep up the good work!
Post a Comment